
Connect to your company's internal databases using a secure VPN tunnel
MineOS allows using a VPN tunnel to securely connect to your company's internal resources, such as databases.
Follow this guide to setup a VPN tunnel.
Before you begin:
- Make sure you have a MineOS account with an enterprise plan. If the VPN feature is not enabled for your account, ask your customer success manager to enable it.
- Make sure you have your VPN gateway's public IP address ready.
- You should be comfortable setting up a VPN gateway and configuring routing/network rules, as wrong settings might lead to an insecure setup!
Creating the VPN tunnel in MineOS:
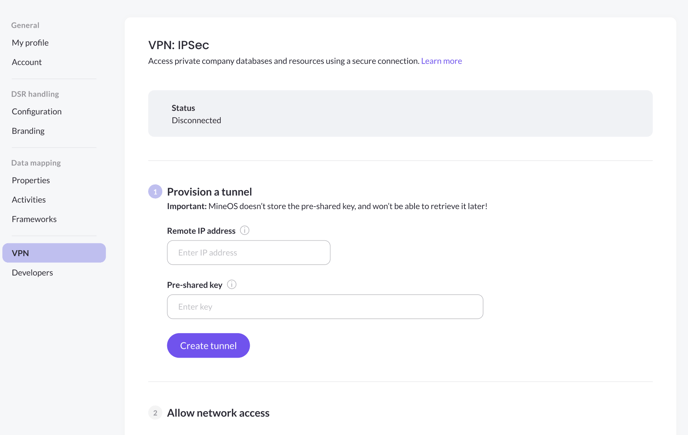
- Login to your MineOS account and goto Settings -> VPN Tunnel
- Type in the public IP of your VPN gateway.
- Type in your pre-shared key. If you don't yet have a key, you can generate one here.
- Note: MineOS does not store your key, and will not be able to retrieve it later for you.
- Click Create tunnel and wait for the tunnel to be provisioned. This can take a few minutes.
- Once the tunnel has been provisioned, you will see the "waiting for a connection..." message:
- You can copy the MineOS gateway IP and paste it in your gateway's settings.
- You can also copy the MineOS subnet, which is the source IP range for any traffic outgoing to your network. Use this subnet to whitelist it in your firewall settings.
Tunnel Basic Settings
- IKE Version: 2
- Local Selector Subnet: 0.0.0.0/0
- Remote Selector Subnet: 0.0.0.0/0
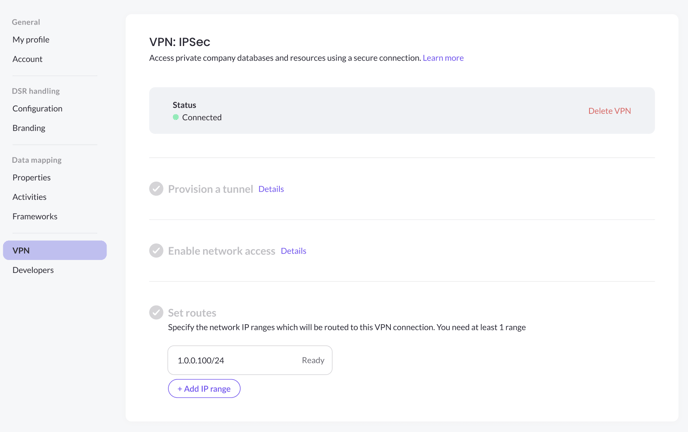
- Once your gateway and tunnel is configured on your side and a successful connection have been made, you should see the status change to "Connected".
- Lastly, add the IP addresses/ranges you want to make routable through the tunnel, under the "Set routes" section.
- Note: leaving this section empty renders the VPN useless, as no IPs will be routable through it
- Note: leaving this section empty renders the VPN useless, as no IPs will be routable through it
That's it, you have successfully setup a VPN tunnel! Any integrations that use IPs from the subnets added will be routed through the VPN.
Changing VPN Settings
- You can add/remove subnets at any time.
- To make changes to the gateway/tunnel settings, you will have to delete the VPN tunnel and setting it up again. A tunnel can be deleted by pressing "Delete tunnel" at the top of the page.
Troubleshooting
Any error during the setup process is displayed in the settings page inside MineOS, so its easy for you to troubleshoot. If you need further help, please reach out to your customer success manager.
Current Limitations
MineOS VPN feature currently has the following limitations:
- The supported VPN Tunnel protocol is: IPSec.
- Maximum number of VPN tunnels per MineOS account is 1.
- The VPN Tunnel cannot route traffic to any of the following reserved subnets:
Tunnel Advanced Settings
- IKE Lifetime: 8h
- Tunnel Lifetime: 1h
- Encryption(Phase 1): aes256
- Encryption(Phase 2): aes256
- Integrity (Phase 1): sha512
- Integrity (Phase 2): sha512
- Diffie-Hellman Groups (Phase 1): 21
- Diffie-Hellman Groups (Phase 2): 21
- Dead Peer Detection Delay: 10s
- Dead Peer Detection Timeout: 30s