
Implement a rule that sends automated Acknowledgment messages when new requests are received and verified.
About the Acknowledgement rule
Note: This article is about 1 of 2 available rules.
When you set up an automated Acknowledgement rule, a predefined automated response will be sent to the user each time an incoming request gets validated.
How to set up an Acknowledgement Rule

To get started, select "Templates & Rules" under the DSR Handling section of the sidebar navigation.
Select the "Rules" tab.

Next, select "Acknowledgement Rule".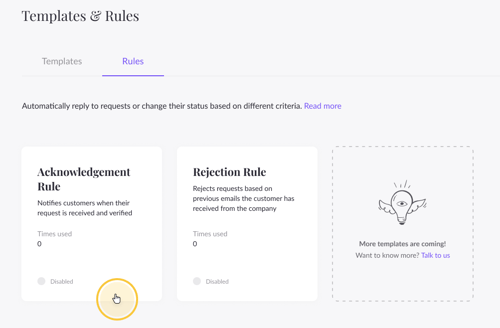
The text box will display a default message, but you can always change it later and enter your own custom message to the user.
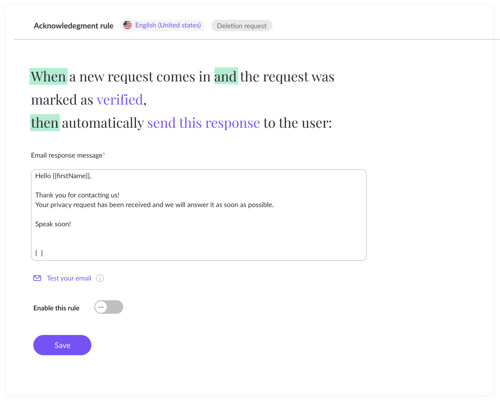
Tip: You can add variables to your Automated response templates to make them more engaging and effective. Just click the icon on the bottom left of the text box and greet each user by their first name or email address.
To activate the rule, toggle on “Enable this rule” and then click “Save”. If you choose not to enable your Automated response now, you can always leave it un-toggled and save it for future use.
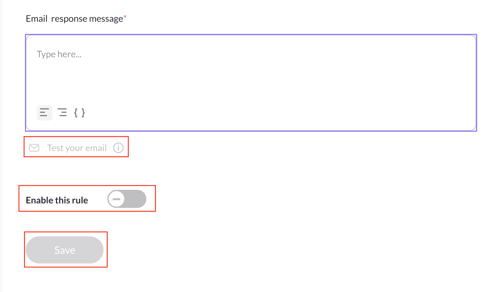
Tip: You can test your email template by clicking on “Test your email”. This will send a test email to the email address you registered with to the Portal.
The number of emails sent using this rule will appear on the rule card under “Time used”.
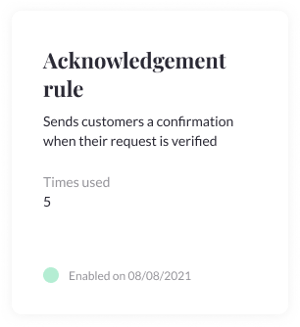
Once enabled, every verified privacy request will receive an acknowledgment response.
Each response sent under the new acknowledgment rule, will be logged and appear in the “Recent activity” window on the request's page.
Next steps:
- Create a Rejection Rule
- Begin setting up DSR processing by familiarizing yourself with User Search
If you have any questions about Automations, write us at portal@saymine.com and we'll be happy to help!🙂